
Getting Started with Watchful
This guide helps you set up your organisation, add customers and sites, and prepare cameras for monitoring.
For definitions of key terms used throughout the Watchful platform, see the glossary.
Before you begin
Make sure you have:
An active Watchful Admin Portal login
Permission to create customers, sites, and devices
Access to the site address and camera details you plan to add
Step 1. Add your first customer
Customers are companies that have engaged your organisation to monitor their sites.
Create a customer to group all their sites and devices in one place.
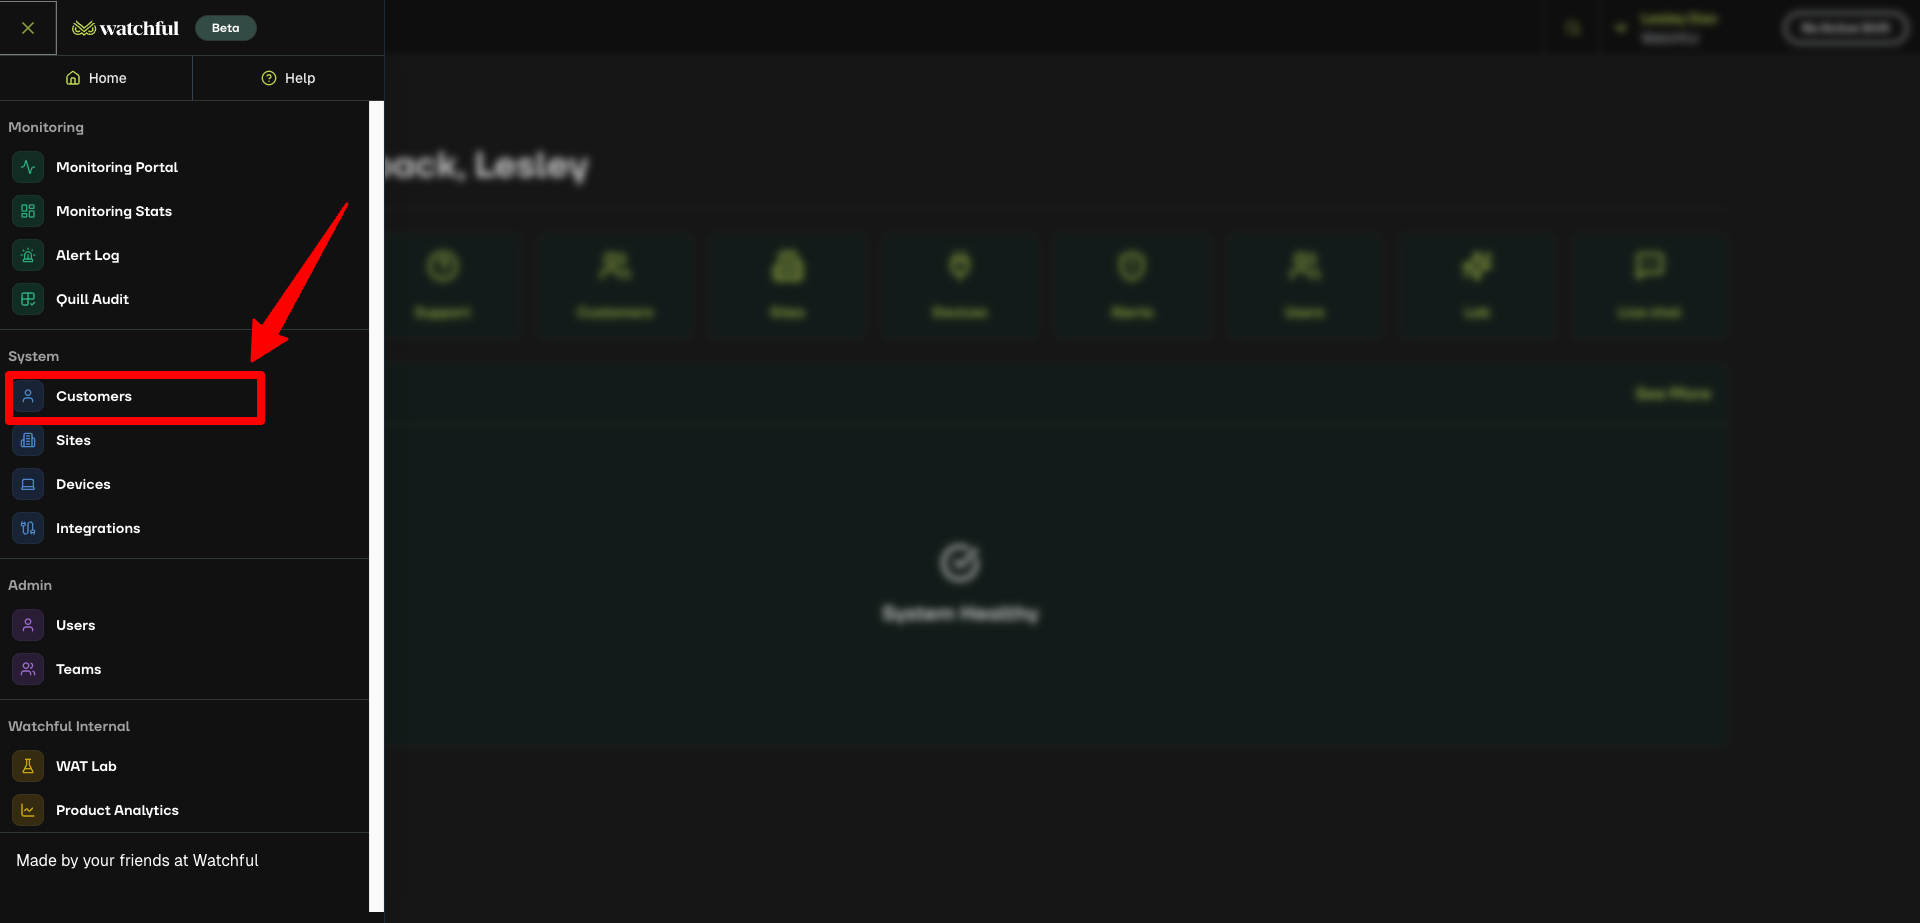
From the Home screen or the left-hand toolbar, select Customers.
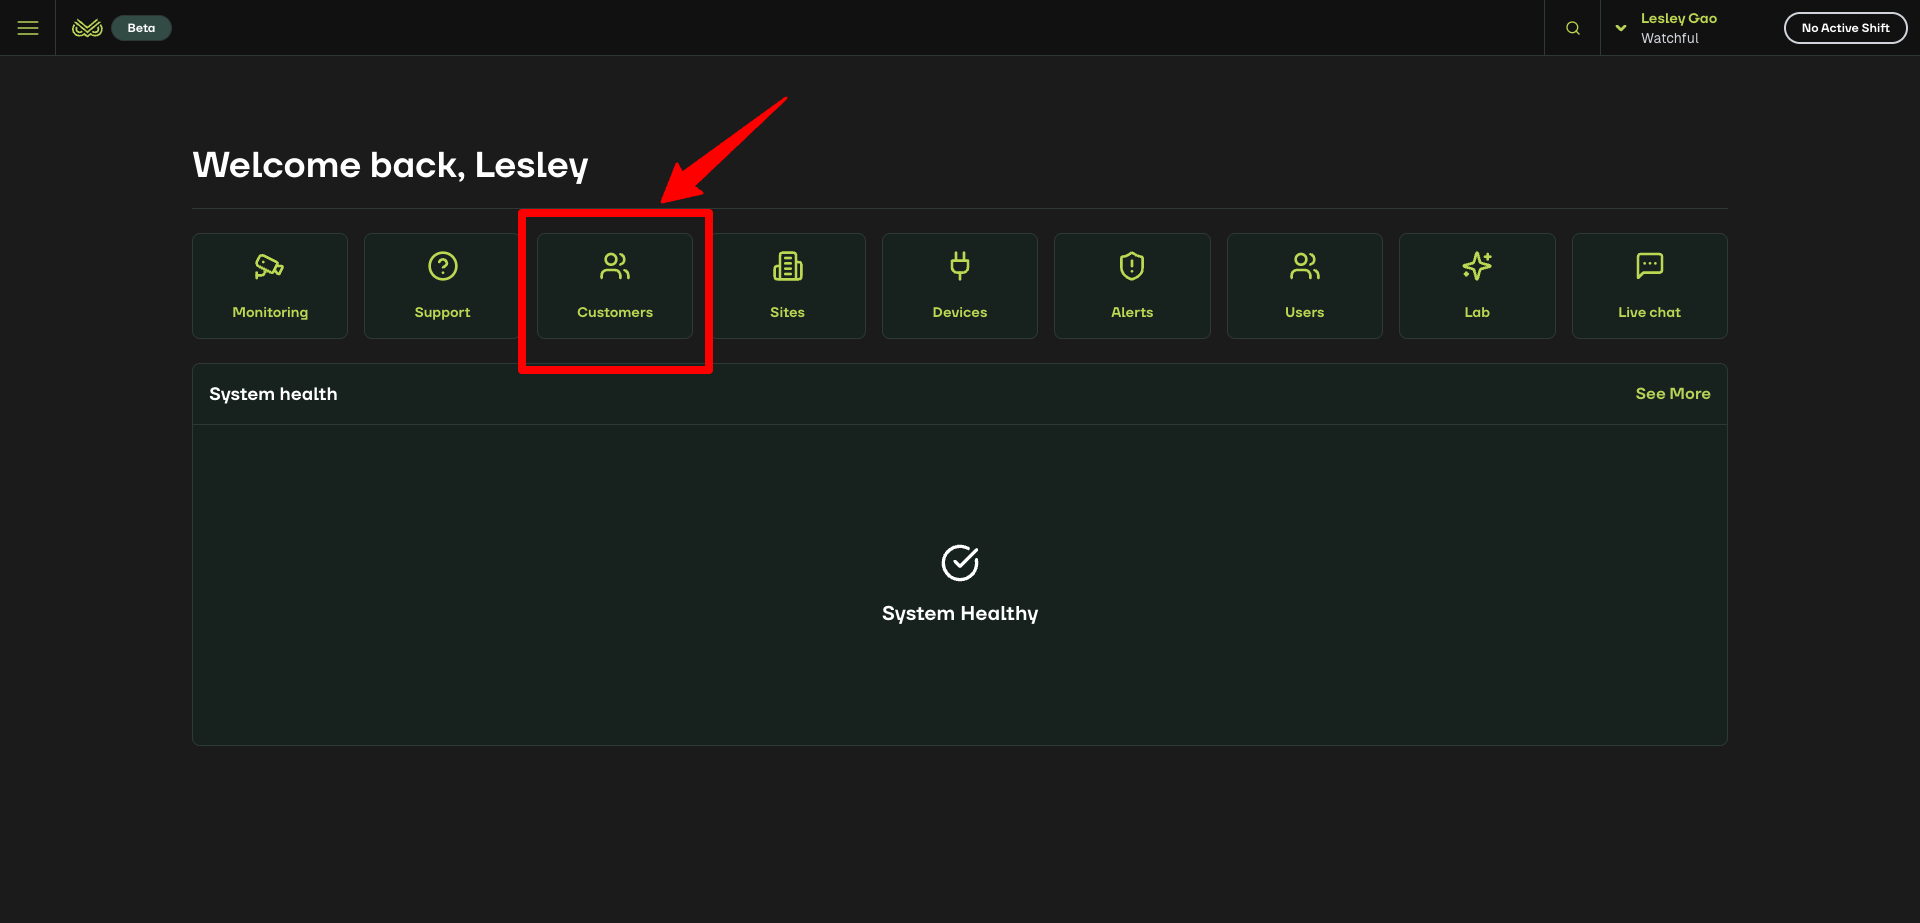
Click Add Customer in the top-right corner.
Enter the customer’s name and required details.
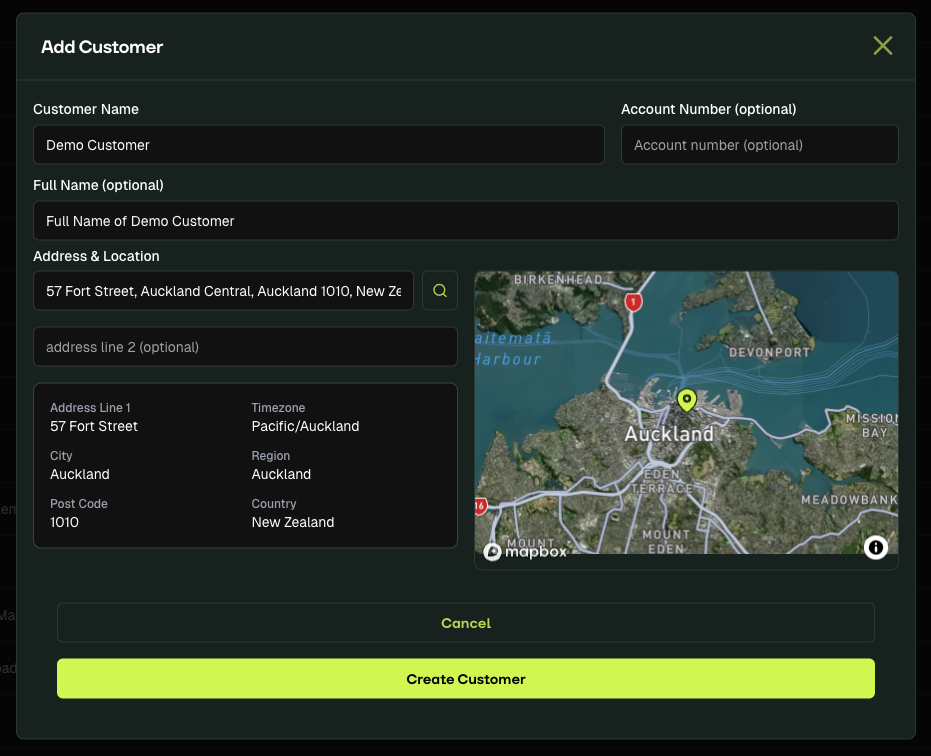
Select Create Customer to save.
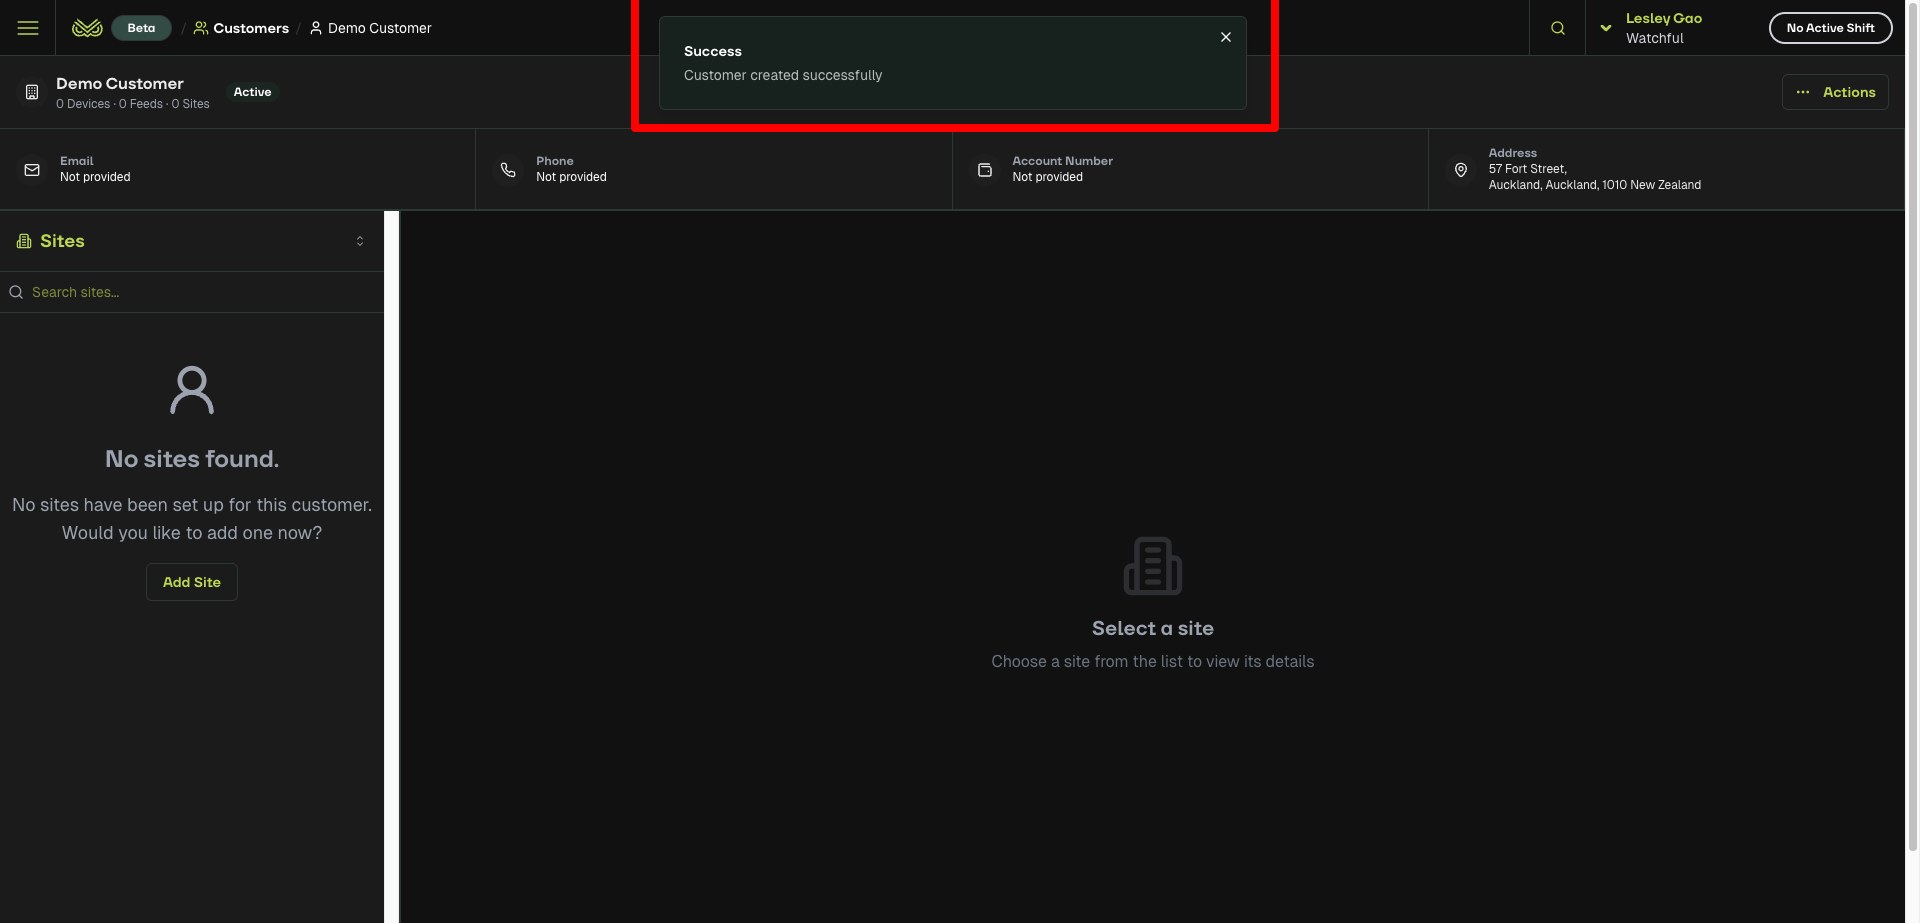
A confirmation message appears at the top: Customer created successfully.
Related Article: Add a new customer
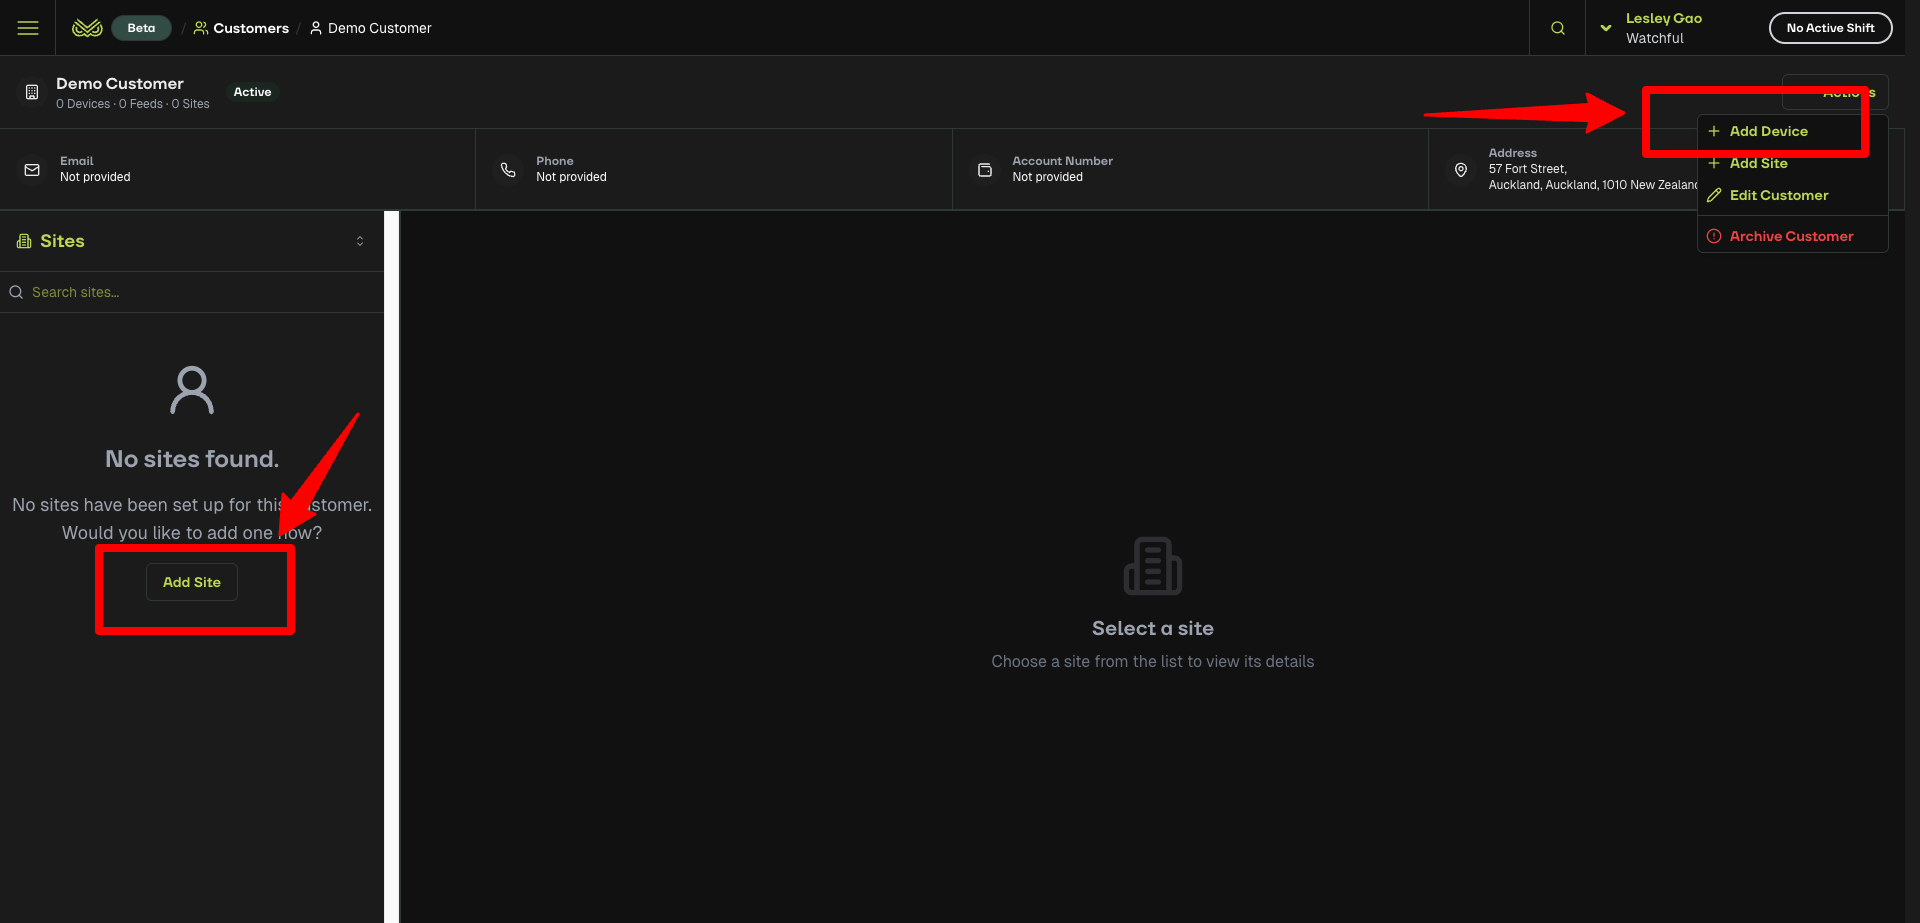
Step 2. Add a site
A site is the customer’s physical location where devices are installed.
On the current page, click Add Site on the left, or open Actions on the right and select Add Site.
On the “Add a new site” page, enter site details and set up Quill Automation and other options. For a full walkthrough, see Steps 2–5 in Add a new site.
Click Save Changes on the top right.
A confirmation message appears: Site settings have been updated successfully.
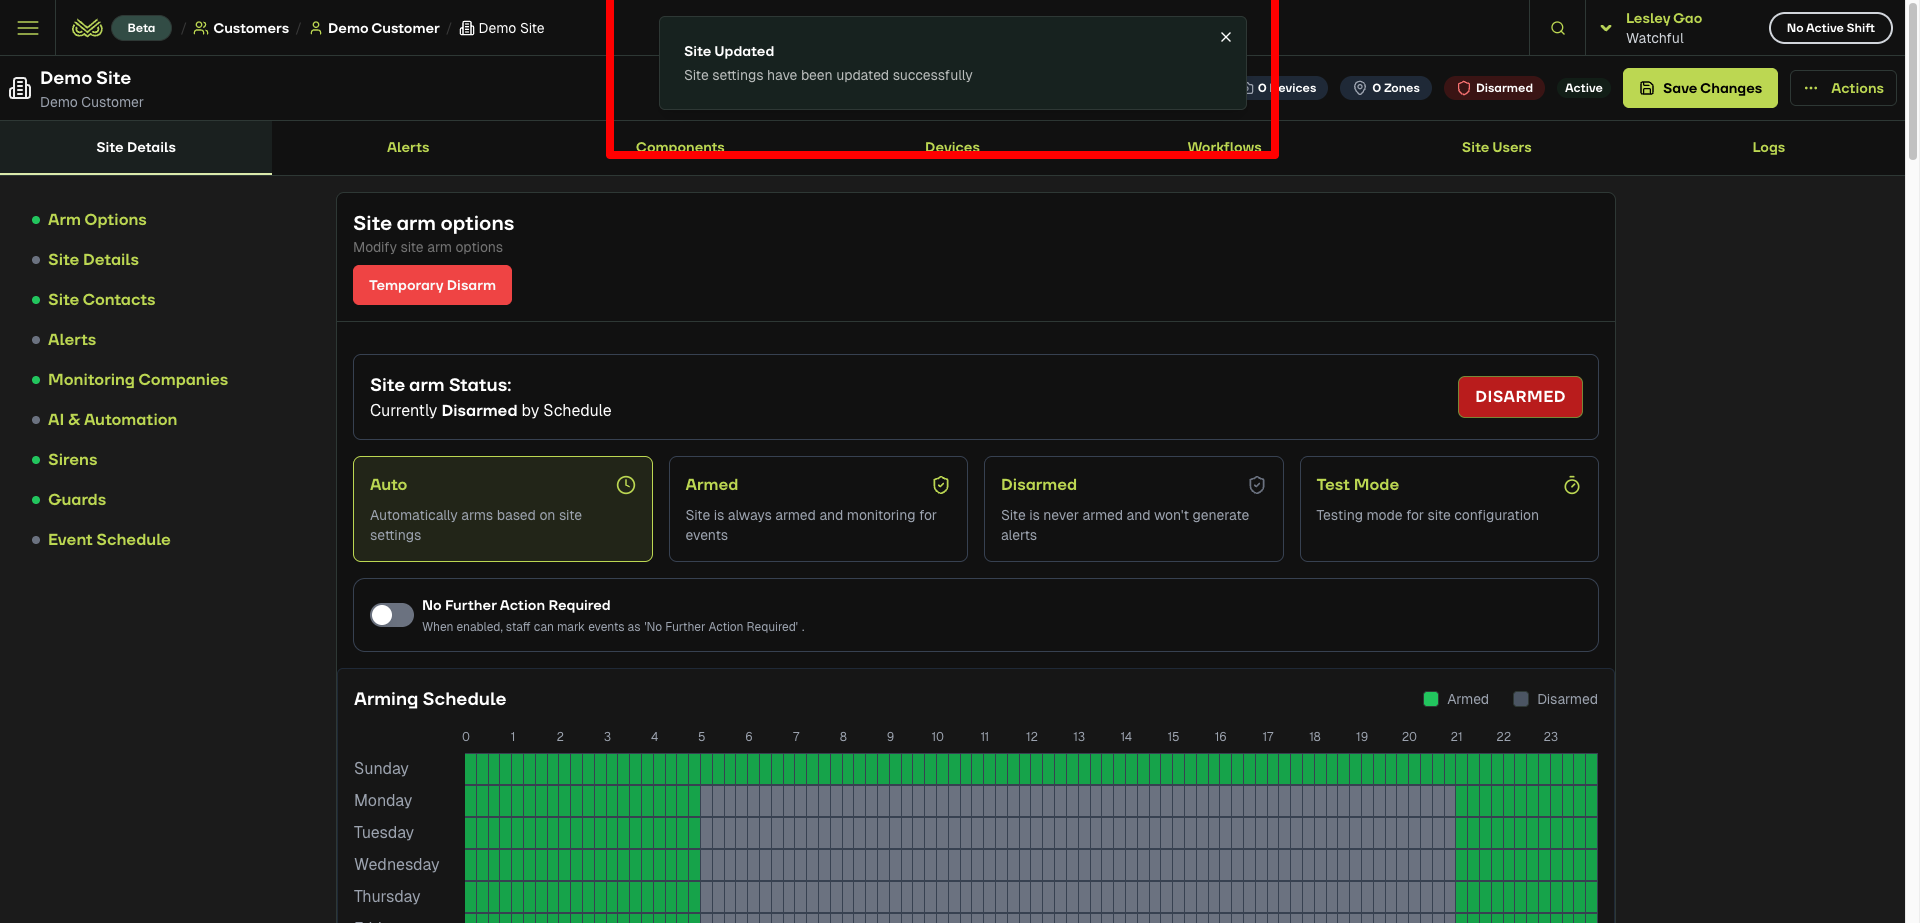
The site is now linked to the customer
Step 3. Set up site details
After creating a site, complete the required configurations.
Make sure you’re in the Site Details tab.
The basic details and Quill Automation settings you entered earlier will already be filled in.
Set up the following:
Arm options
Event detection
Site contacts (if needed)
Monitoring companies
Event schedule
Stages (if used)
For detailed instructions, see Step 2-6 in Set up site details.
For more details on site configuration, see the Site details configurations article.
Step 4. Add an integration(optional)
Integrations connect Watchful to external cloud-based VMS systems.
Once set up, Watchful can see all sites and cameras that the VMS allows.
You may not need an integration:
If you add devices directly using an IP address and credentials
If you only have a few devices not managed by a VMS
You should use an integration when:
Your VMS manages many cameras or sites
You want one connection instead of adding each NVR one-by-one
If needed, follow the steps in Add a new integration.
For help deciding, see About Integrations in Watchful.
Step 5. Add a device
Devices are cameras, NVRs, or VMS systems connected to a customer’s site for monitoring.
Once you confirm whether an integration is required, you can add a device.
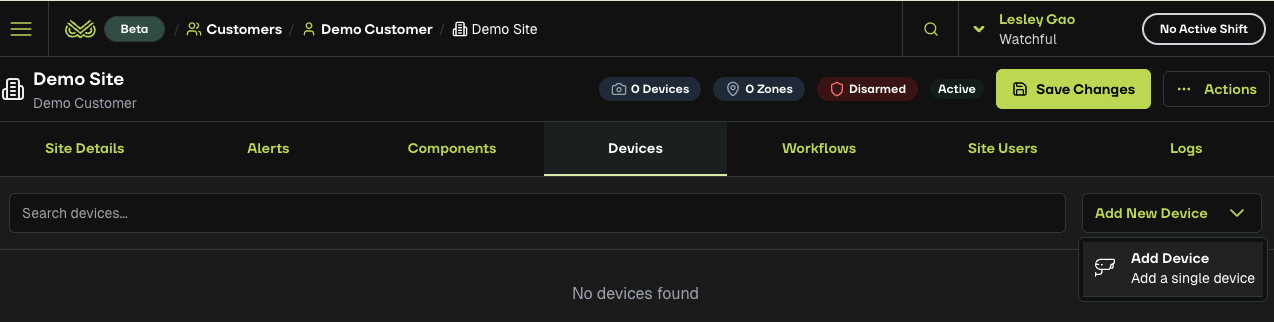
On the page where Site Details are set up, go to the Devices tab.
Click Add New Device, then select Add Device.
Enter the Device Name. Add optional details if needed.
In Connection Settings, choose either Cloud VMS or direct device connection.
For Cloud VMS, select the Device Model and enter the required fields (for example, Customer ID, Role ID, Site ID).
For NVR/Camera, Speaker/Horn, Relay, select the Device Model first, and enter details required in the settings.
Click Connect. A list of available feeds will appear.
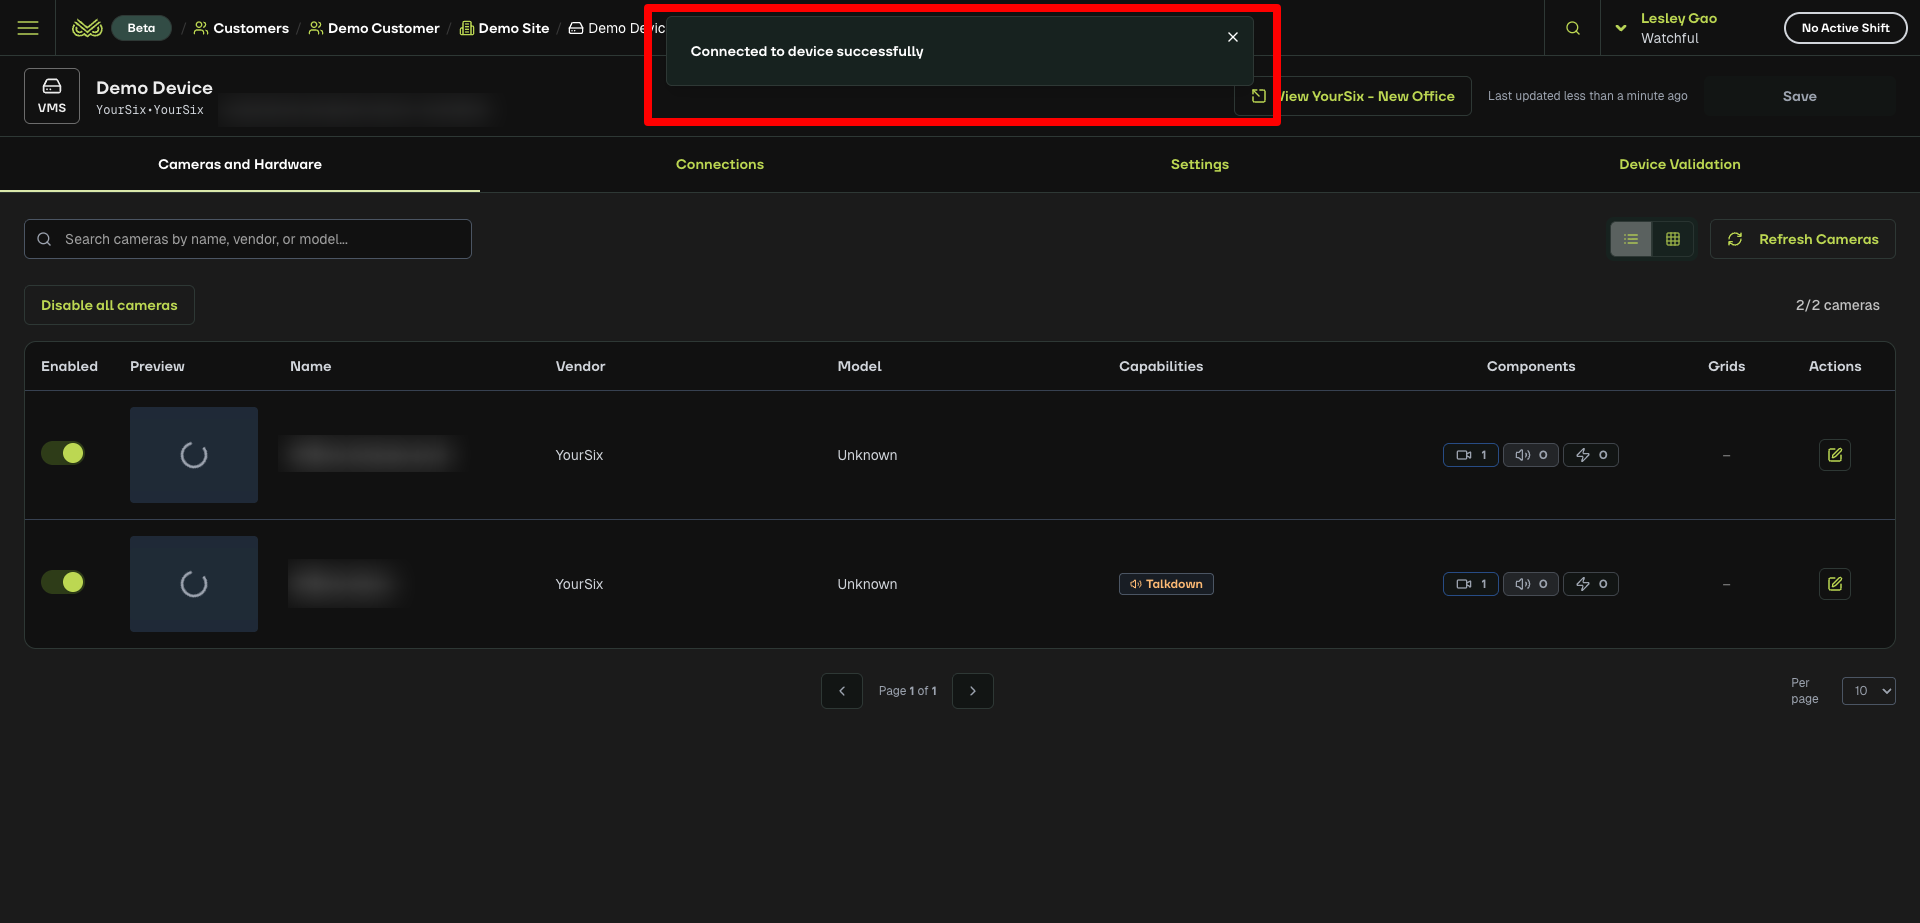
In Confirm Device, select Save Device. A message will appear: Connected to device successfully.
The device page opens and shows all connected cameras and hardware.
For detailed instructions, see the Add a new device article.
Step 6. Enable cameras and set detection grids
Now prepare cameras for monitoring.
Stay on the Cameras and Hardware tab.
Enable each camera you want to monitor.
Follow Steps 3–6 in Enable cameras and add grids to complete detection grid setup.
Step 7. Confirm everything is ready
Check that:
The customer appears in Customers
The site is linked to the customer
Arming options are set
Cameras are enabled
Detection grids are added
Your site is now ready for live monitoring in the Watchful Monitoring Portal.
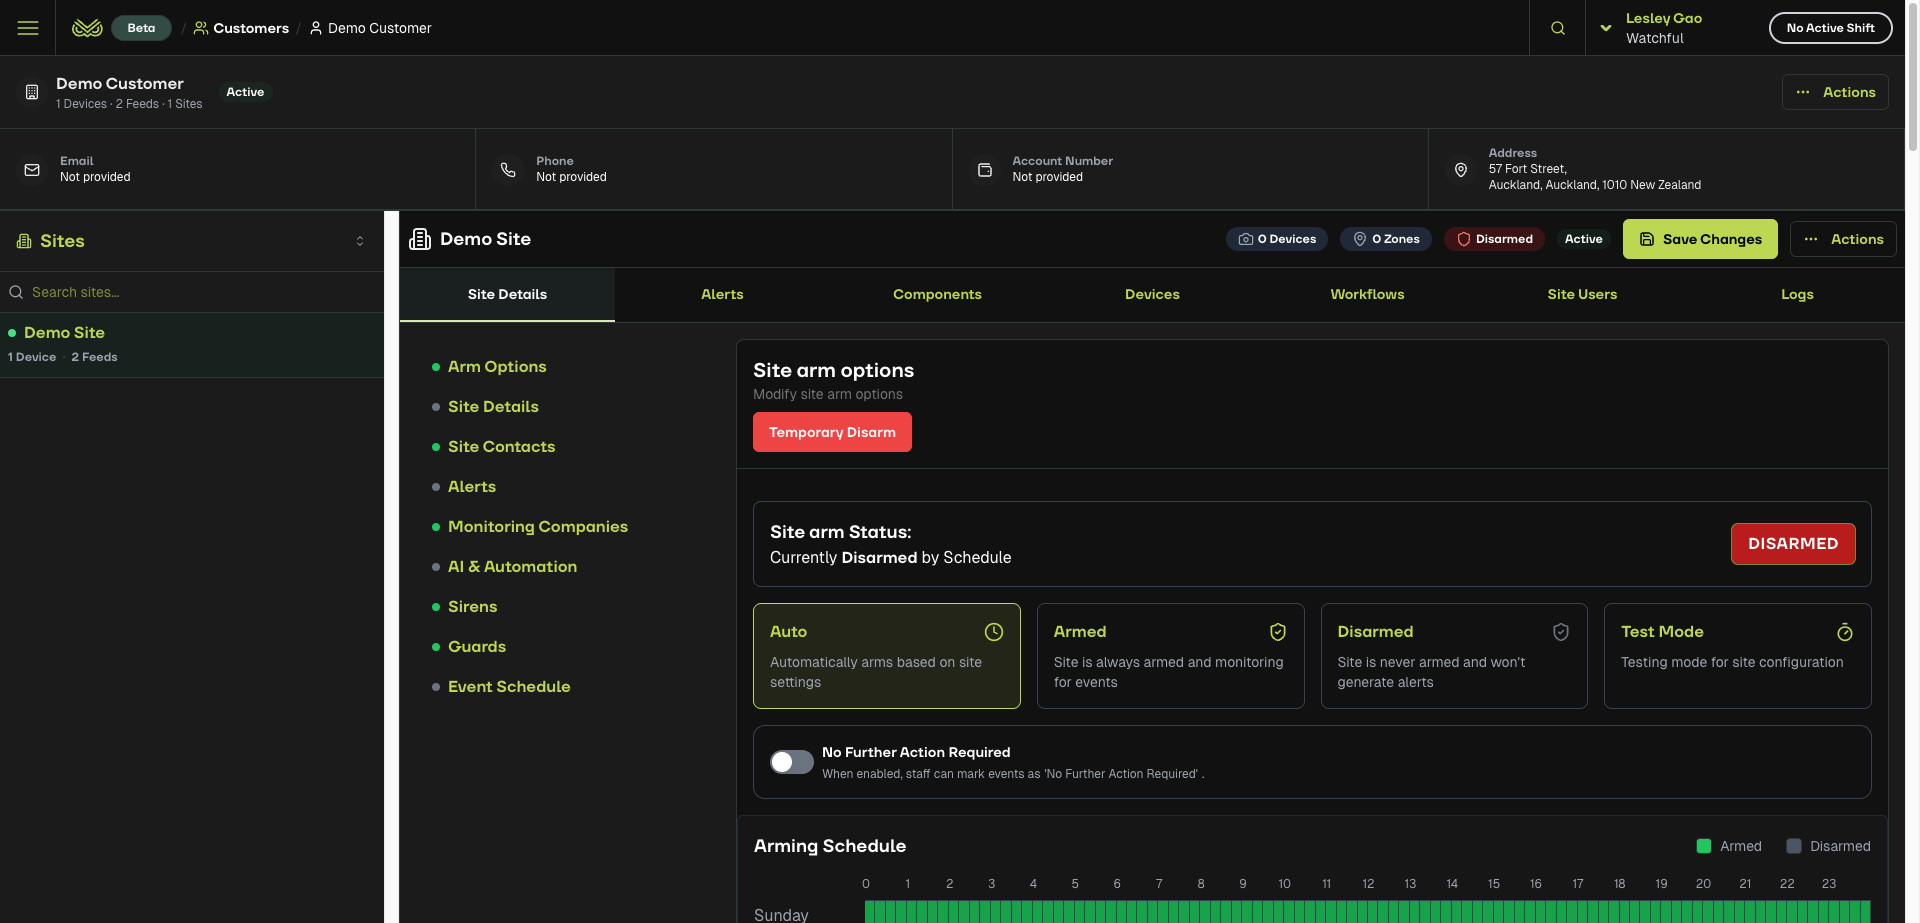
screenshot of example: fully-set-up site